If you were at little Blynn’s 2nd birthday party last September, you may have had the displeasure of using our ultra ghetto/partial finished basement bathroom. For that, I am sorry. Here are some pictures of what it looked like at said b-day fiesta:


Since I am an OCD neat freak and the thought of 20 children running wild in our shiny new house freaked me out, we made a last minute decision to have her party be an outdoor party. Since our main floor is a whole story above our backyard, it seemed necessary to get with the program and finish out our basement bathroom so that people didn’t have to hike up and down the stairs to relieve themselves (AKA enter my home :p). Trent diligently worked on the project every evening after work, but needed more than the 4 evenings that we had to work with to fully finish it. Trent is pretty awesome, and is BIG TIME a man of his word. He told me he would have the bathroom ready, so he “had the bathroom ready”. It had cement board nailed to the framed walls (gaping cracks and all), a functioning toilet, and a sink that ran into a 5 gallon bucket! Like I said, GHETTO.
Since our garage and basement are in the flood plain, everything that we do down there has to be able to withstand being underwater, otherwise we are wasting our time and money – two things I HATE doing. With that being said, this project was more complicated than just sticking some drywall up on the walls and painting it. Our original plan was to tile all the walls, but tile takes forrrrrrrever. After using the ghetto bathroom for an embarrassing 6 months, we finally decided on a water proof wall solution other than tile. We installed smooth, low profile Hardie Board siding (the same material that we used on the exterior of our home) to all interior walls (shower walls and all!) and coated them with exterior grade paint. It has the same look as shiplap, but won’t have to be torn out if/when this thing ever floods! It is also pretty quick to install as you just shoot nails through it! I used my furniture paint sprayer to paint the walls and knocked 2 coats out in less than an hour!
Here she is, looking WAY better than last September!

This petite bathroom has no AC so this teeny tiny fan is not only SO CUTE, but totally necessary for hot Texas summer days!

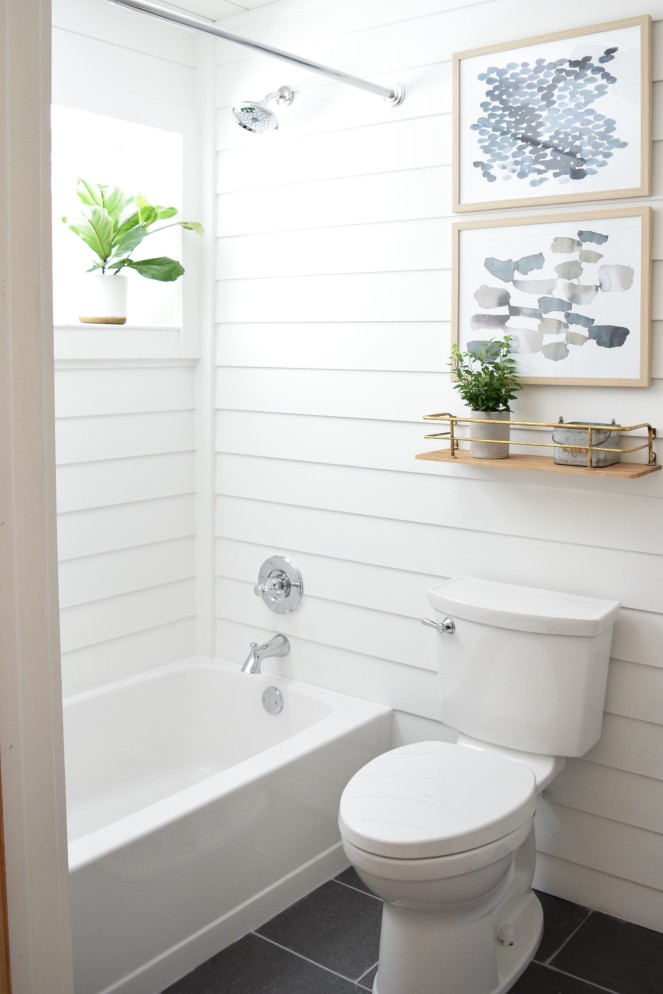
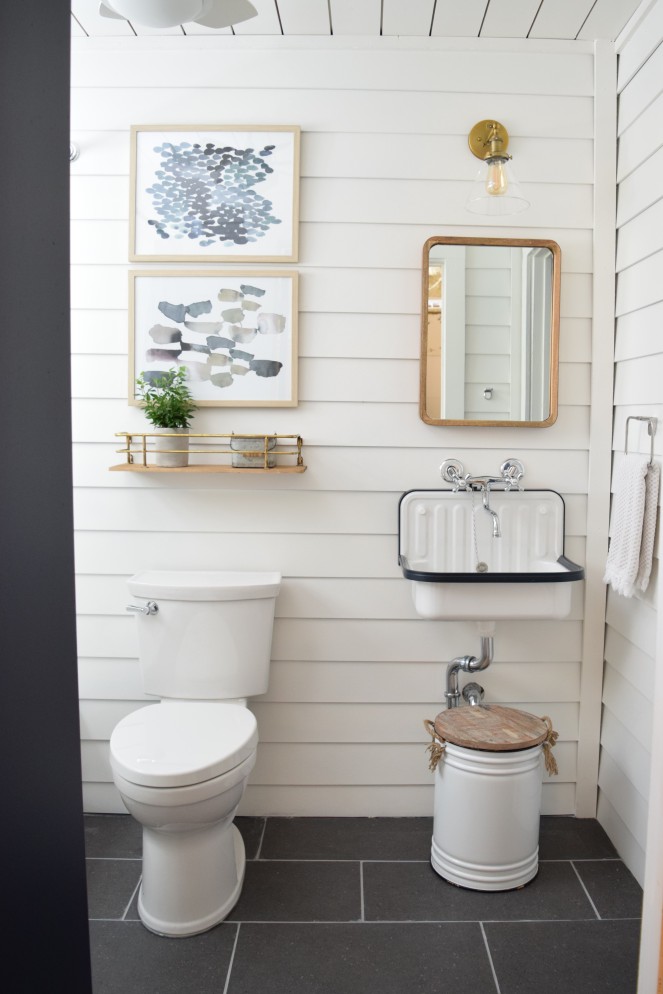
These watercolor prints have been stuffed in a closet for months without a home. They didn’t work anywhere I tried them, but I liked them enough to not get rid of them (crazy talk for me, right?!). I think they finally found their *forever home*!

If you haven’t realized by now, I have an obsession with putting cute little shelves above the toilet. Every toilet in my home has a shelf over it, perfect for holding decorative items and little baskets that can hold bathroom essentials that you don’t want to put on display, but don’t want to hide – i.e. feminine unmentionables, TP, and most importantly, MATCHES …

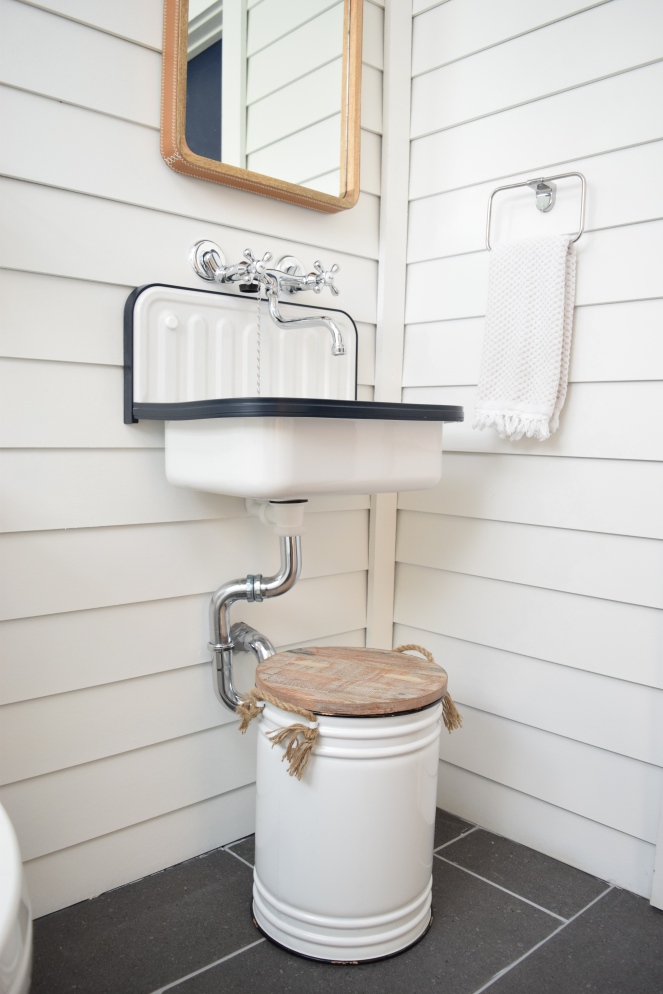
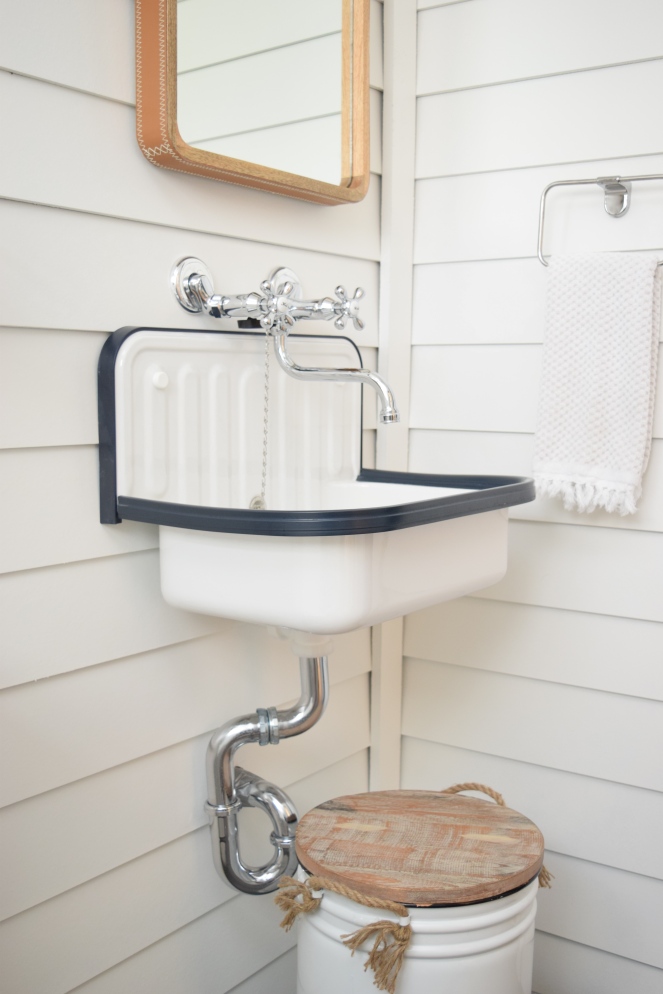
As per usual, we went with chrome plumbing. I love how clean and classic it looks.

If you know me, you know I have fallen HARD for these big leaf beauties and have an array of them strategically placed throughout my home. Yes, even the basement bathroom gets a live fiddle leaf.


Though I love the clean look of chrome plumbing, I am also a fan of brass. We made sure to sneak some in with this industrial fixture and the floating shelf. This West Elm inspired mirror was snagged off a target clearance section for $30.00! It is fabulous and was the PERFECT size for our petite bucket sink!

I knew I didn’t want white doors down here since they show dirty hand prints easily. The navy blue trim from the sink inspired me to go with blue doors. The decision was solidified when my friend gave me a couple of blue sample paints that she had no use for. There wasn’t enough of either to use just one so I dumped them together and made this custom shade. It isn’t bad for free, and you know I love me some FREE!

Speaking of the sink, isn’t it so cute?! Trent gave me grief about it for a while since it was considerably more expensive than a basic pedestal sink, but I think it makes the bathroom! It also allowed us to install this super cool wall mount faucet! The oversized canister below the sink was a great solution for storing towels in a dust-free place and doubles as a step stool for our vertically challenged small fries!


I have done a ridiculous amount of research on white paint, but feel like I have yet to find the perfect white paint. That is until I discovered the wonderful Sherwin Williams shade called Snowbound! It is true white with no pink or yellow undertones, but not too bright. JUST what I was looking for for this space!


We are loving having a nice FULLY FUNCTIONAL bathroom on the ground level of our home. It is such a treat after using a bathroom that was worthy of being part of a shack. Now to finish the other 1500 + square feet of our basement/garage… I’ll wait until I have “after” photos to show you the current state of it so that you don’t think we are total slobs.
Until next time!

It may take a lot of hard work to redesign the messy bathroom into a fully functional and clean one. I’m willing to redesign mine as well within a couple of weeks. Wish me luck 🙂
LikeLike
We have been renovating our basement for almost 9 months and I’ve been stuck on the little details for the powder room down there. Thanks for the inspo!
LikeLike
Hi Sara! I’m happy I was able to give you inspiration! Good luck with your renovations and thanks for stopping by my blog!
LikeLike
Did you end up having to caulk the entire room with the siding?
LikeLike
No, we did not. We treated it as you would an exterior area and only caulked the seams in the corners. (And around the tub and plumbing, of course.)
LikeLike