Remodel? Did I just say REMODEL?? Yes, I did say remodel. If you are wondering what the irony in the word “Remodel” is, then you probably haven’t kept up with this blog just like I haven’t kept up with this blog. Whoops. Anywho, the irony is that I am posting about the remodeling of a room that was never even posted on the blog to begin with because I suck at blogging.
Since it’s been like 4 years since the last blog post, we have some catching up to do. I have been MIA for a number of reasons but the most important is a REALLY good reason. When I started this blog over a decade ago, I was a bored, stay at home mom trying to find a creative outlet to give me some purpose aside from momming, cooking and cleaning house. Fast forward to 2021 and the blog that gave me some sanity and sparked the idea for my business took a backseat because my business went WILD. Though I created Creekside Designs in 2017, it was what I called a “Jobby”. A job that was more of a hobby. It didn’t take much of my time and certainly didn’t give me much money. Once Covid hit and people discovered that they actually cared to care about their home, my business was booming! No year has been quite like 2021, but I have had a steady stream of business coming my way ever since hence the MIAness over here.
Now, back to the topic of the bedroom remodel…
I never revealed either of my girl’s rooms in the blog just like I haven’t revealed most of the rooms in this house that we have now lived in for 6 years. Whoops again.
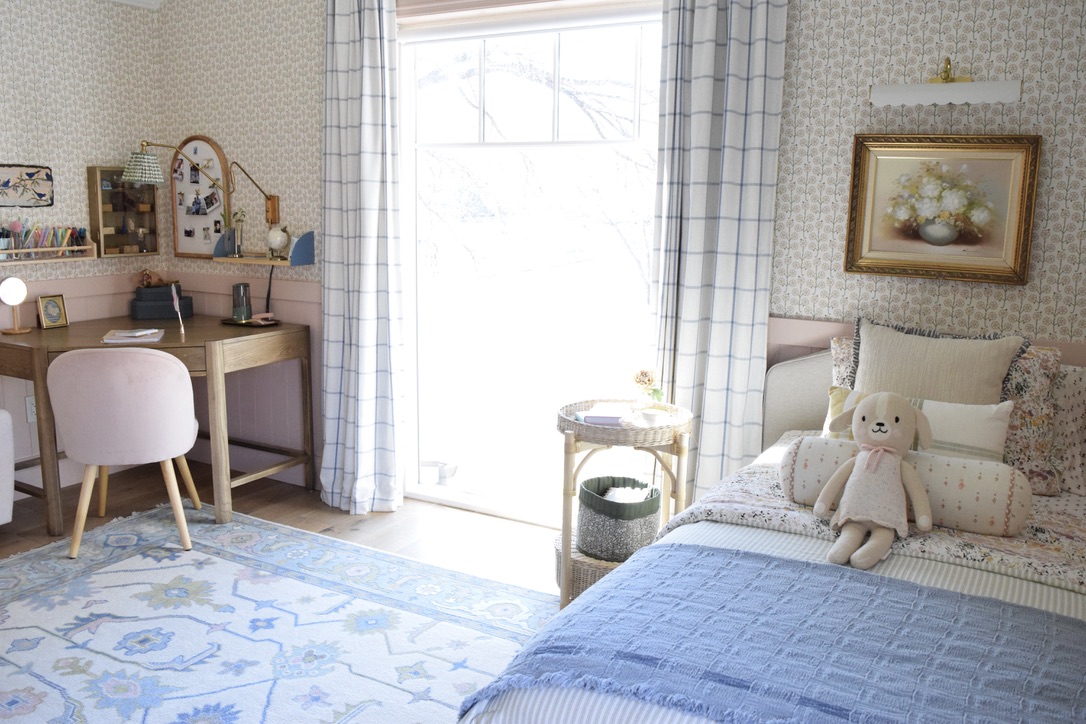
My youngest daughter Blynn is about to be 11. She is a smaller version of me and loves nothing more than a well-organized, well-designed, tidy room. She had a nice room but began having an obsession with getting a twin bed rather than the full that she had. Since she is such a little clean freak like her mama, her issue with the full-size bed was that it took up so much of her room that people felt inclined to sit/play on her bed. If you are a fellow OCD person, you know the crime of having someone sit or play on your bed. IT’S. NOT. OKAY. I’m kidding! Except I’m not… Since her concerns were pulling at my heart strings, I thought she deserved a little room revamp complete with a twin bed pushed against the wall (this is an interior design crime, but shhhhh – she doesn’t know that).
Here is a peek at her old room:
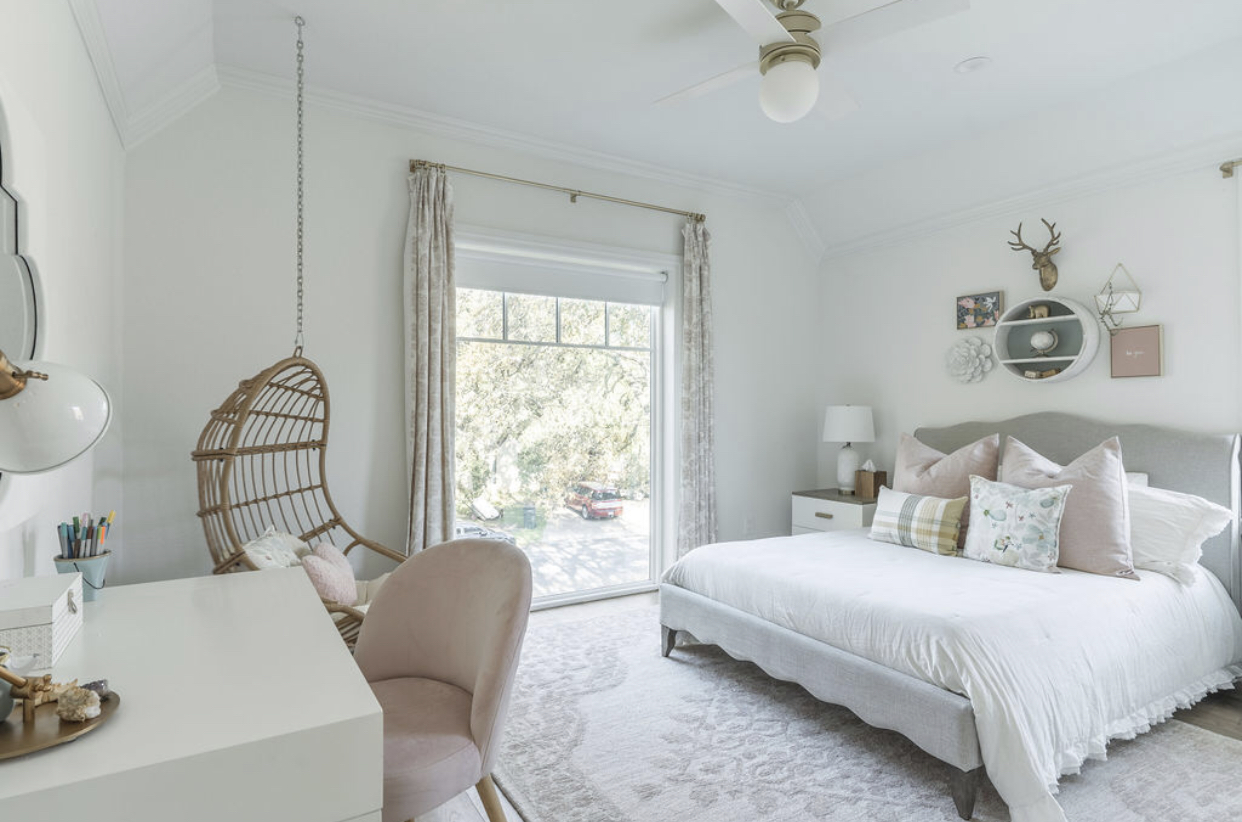
It was a lovely room IMO and even had a swing chair in it. Do you know what I would have given to have a swing chair in my room when I was a kid?! Sheesh, kids these days…
In her defense, she was okay keeping the new room very simple. All she wanted was to swap the bed for a twin and have more “organized storage”. It is music to my ears to hear a child have a desire for organized storage, so it was an easy sell. Of course I couldn’t keep things simple and told her that if we were changing one thing, we were going alllllllllll in.
And so began the design process. You might wonder where the process begins, which is the million dollar question. For some it may begin by browsing images of bedrooms on Pinterest or Instagram until you stumble upon something or somethings that you like. I prefer to not take this route as it can cause design tunnel vision and result in a copycat of someone else’s room. I like to find an anchor piece and build around it. The anchor does not have to be something big but it does need to be something you LOVE. Sometimes it’s a rug, an art piece or even a pillow, but in this case I was building on the wallpaper that I had selected.
Wallpaper is a commitment so this is not a finish that you want to pick on a whim. I had actually almost completed a design based on a particular wallpaper and after weeks of work I decided it was not the paper I wanted to go with. My client was not pleased when I told her that the design process was starting over, but she was smitten with the final design!
Without further ado, let me present Blynn’s new room!
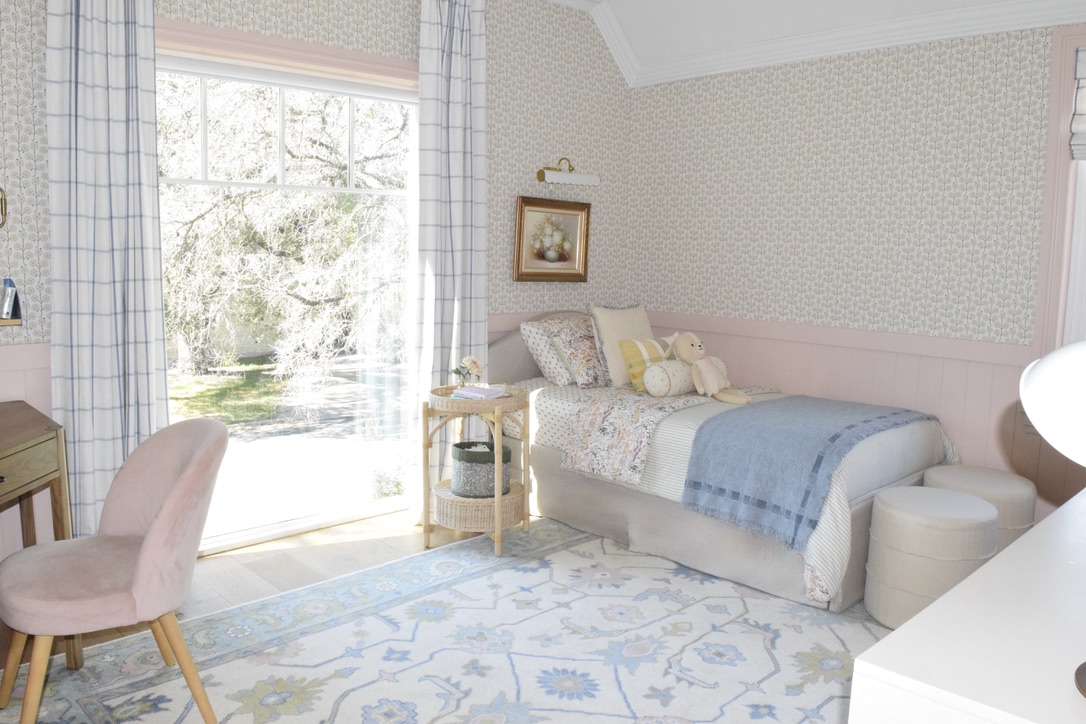
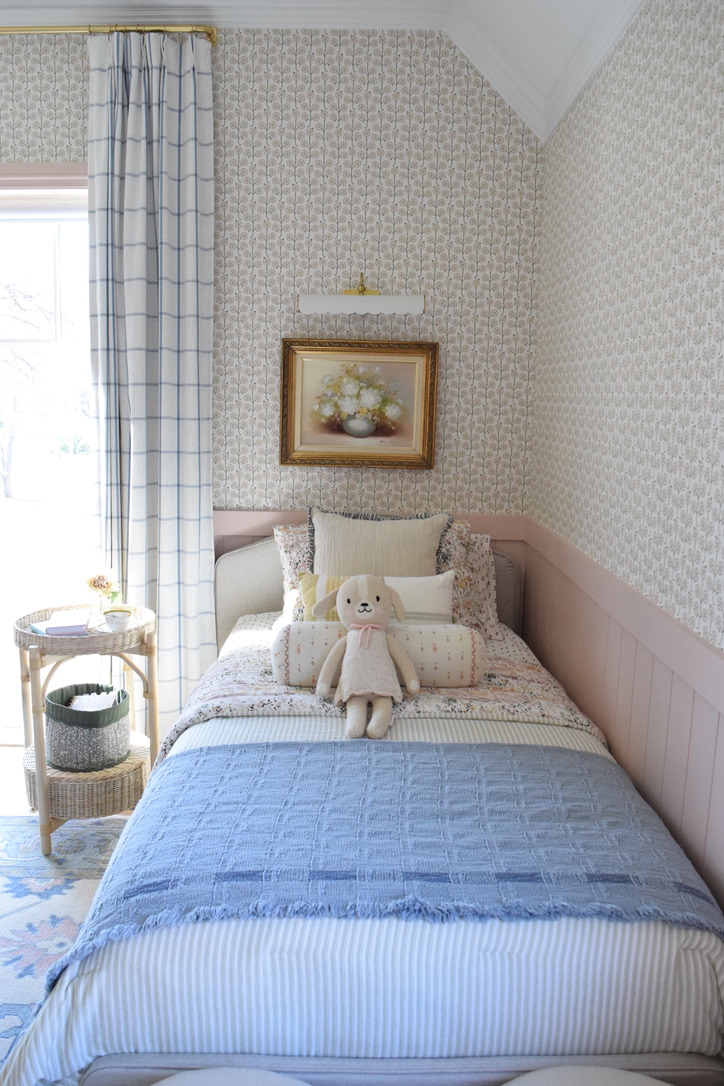
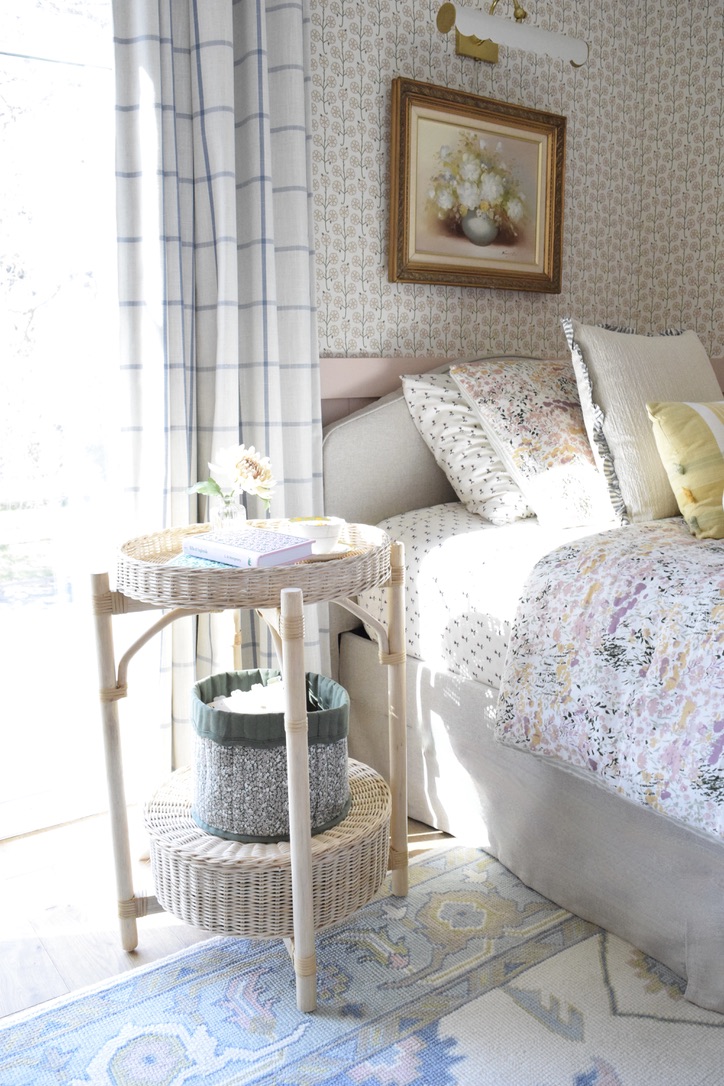
As you can see, we were not afraid of having a lot going on. It is a pattern party in here and I am bout it! It is hard to tell from the pictures, but the wallpaper is actually little hearts that make up flowers on a vine.
When layering patterns the scale is something to not overlook. Since the wallpaper is small scale, I went with large scale patterns for the rug and the curtains.

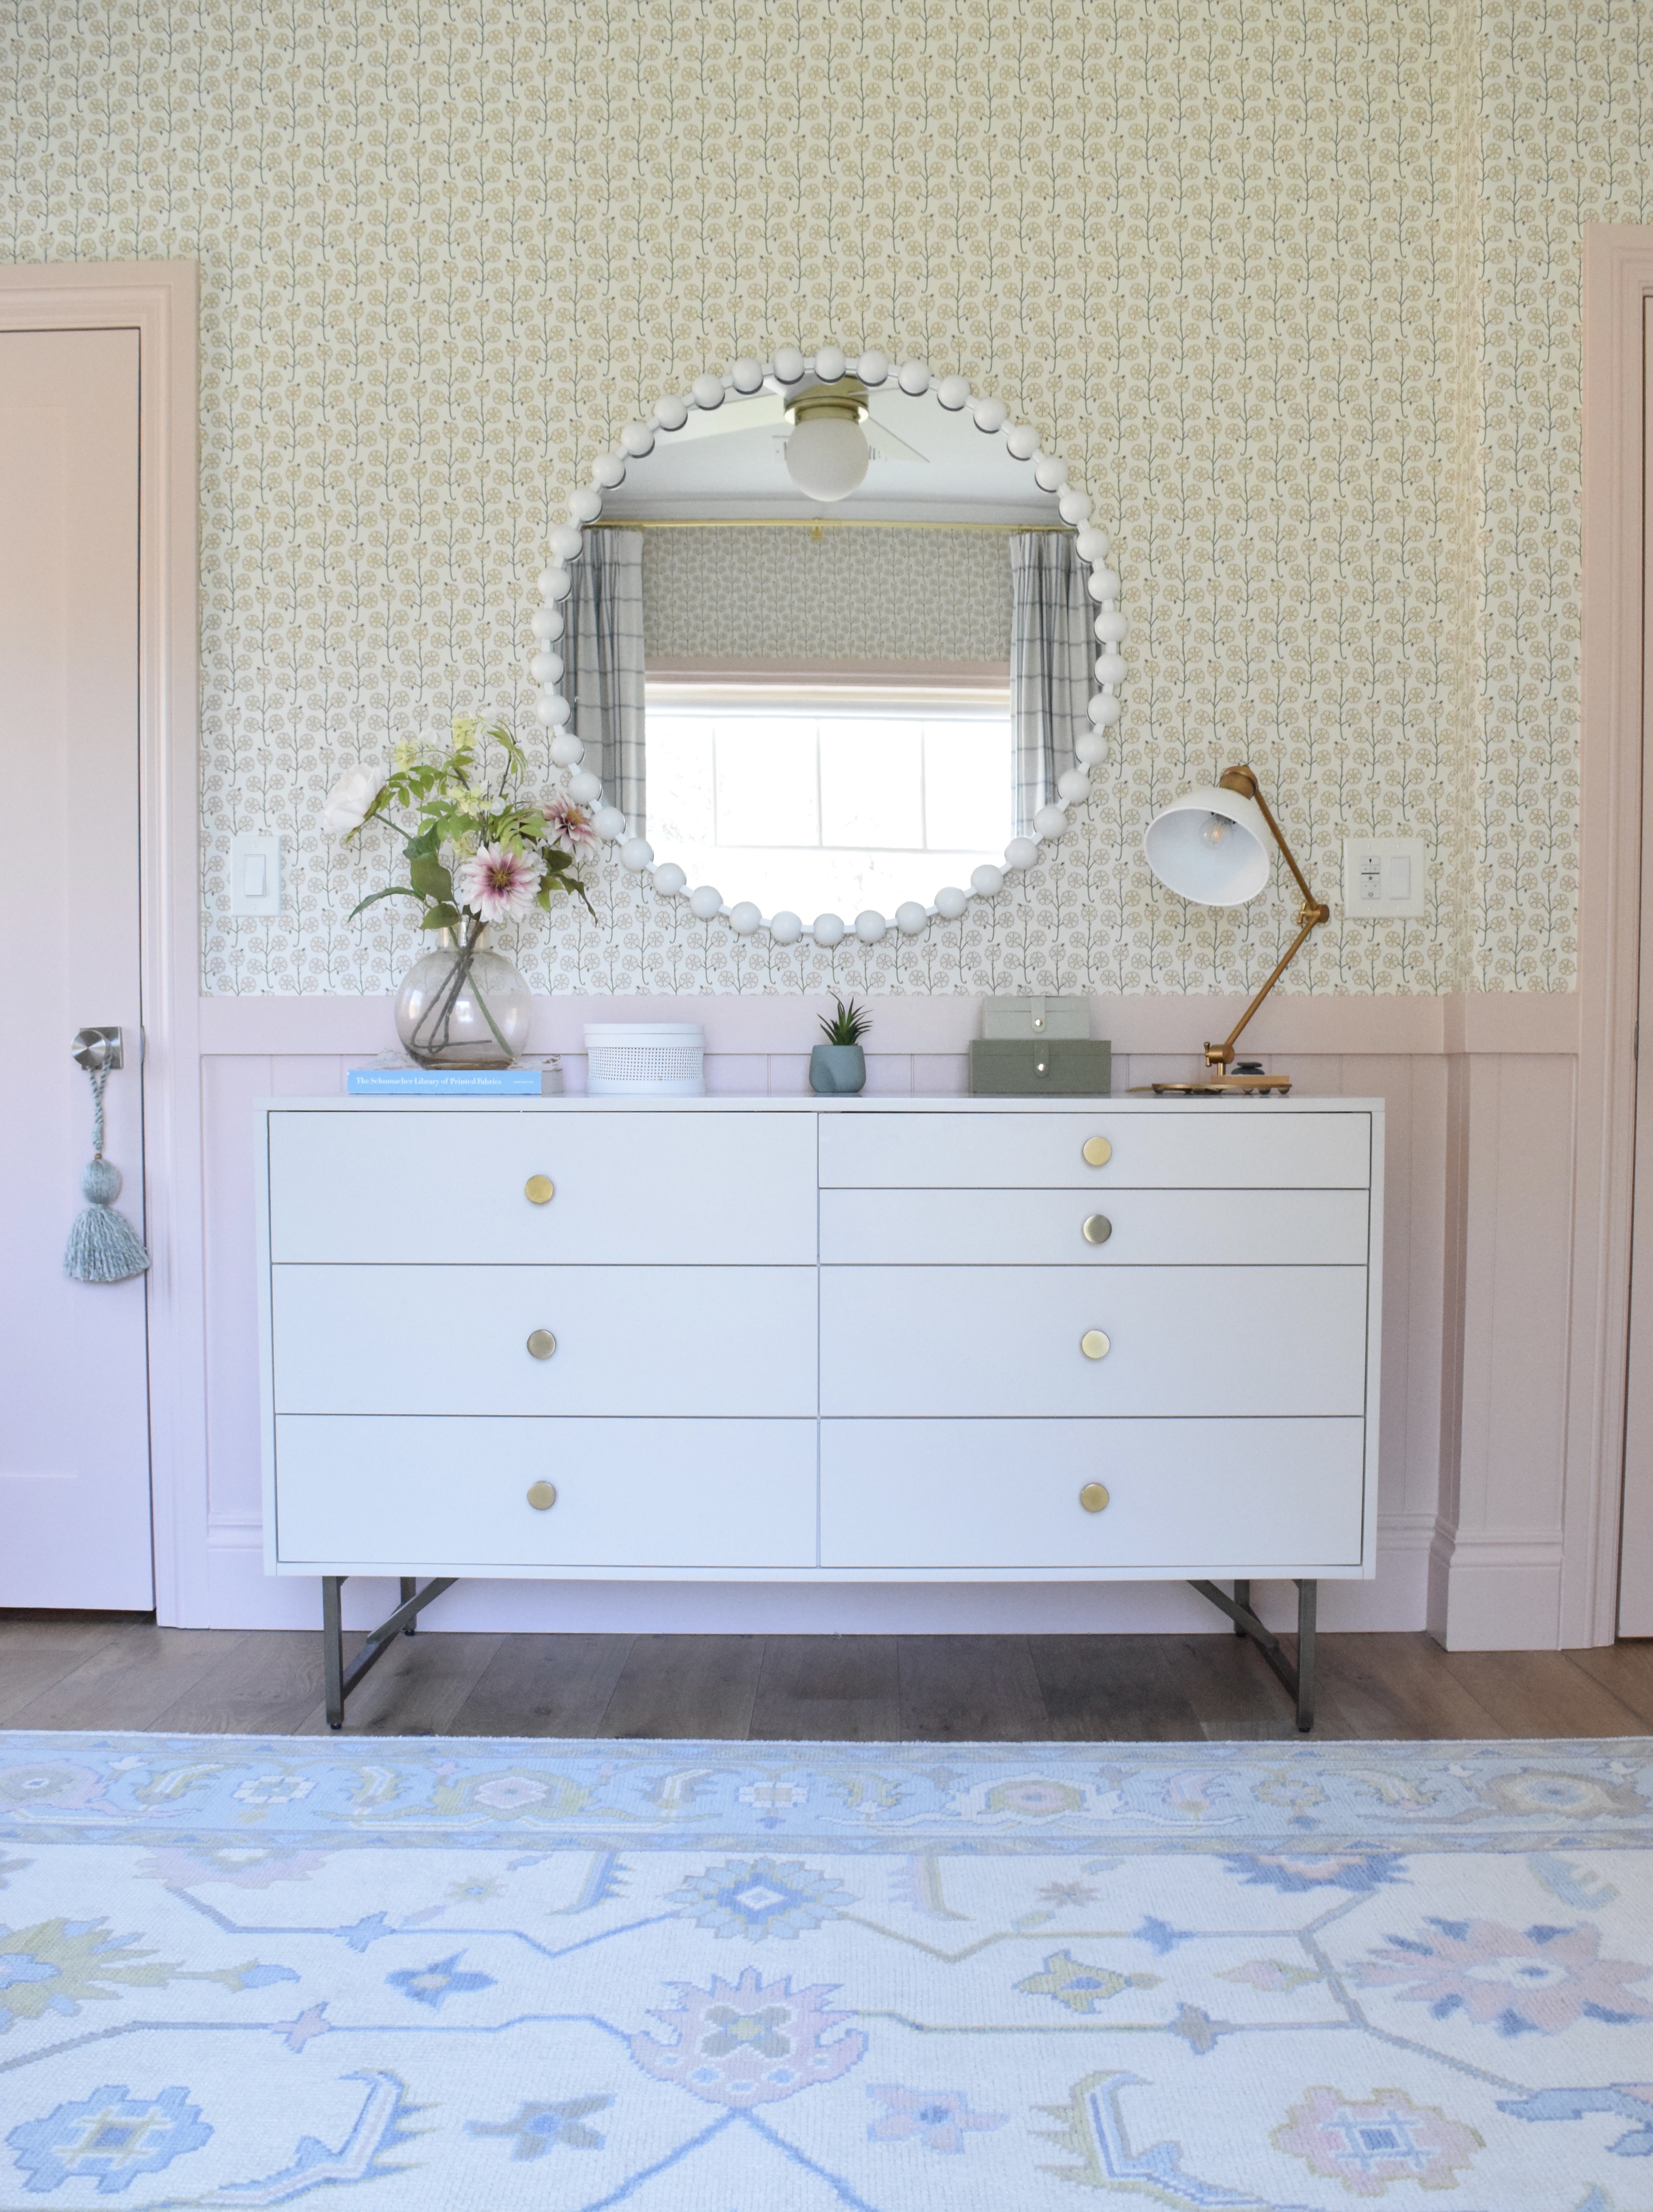
I painted the wainscoting and trim the most fabulous shade of pink. My handy husband who is the household fixer, builder and DOER of all things including sewing, crafted the roman shade out of an extra curtain so that the window treatments would match! He’s a real GEM, y’all. While I am giving him props, I should also mention that he is a master wallpaper installer and is to thank for the beautiful paper job in this room! Quality wallpaper (which is a must) is not cheap and installation is also pricey so being able to install yourself can save thousands. If you think you can’t do it, get some quotes and then after you are feeling nice and broke learn how from YouTube like my husband did 🙂
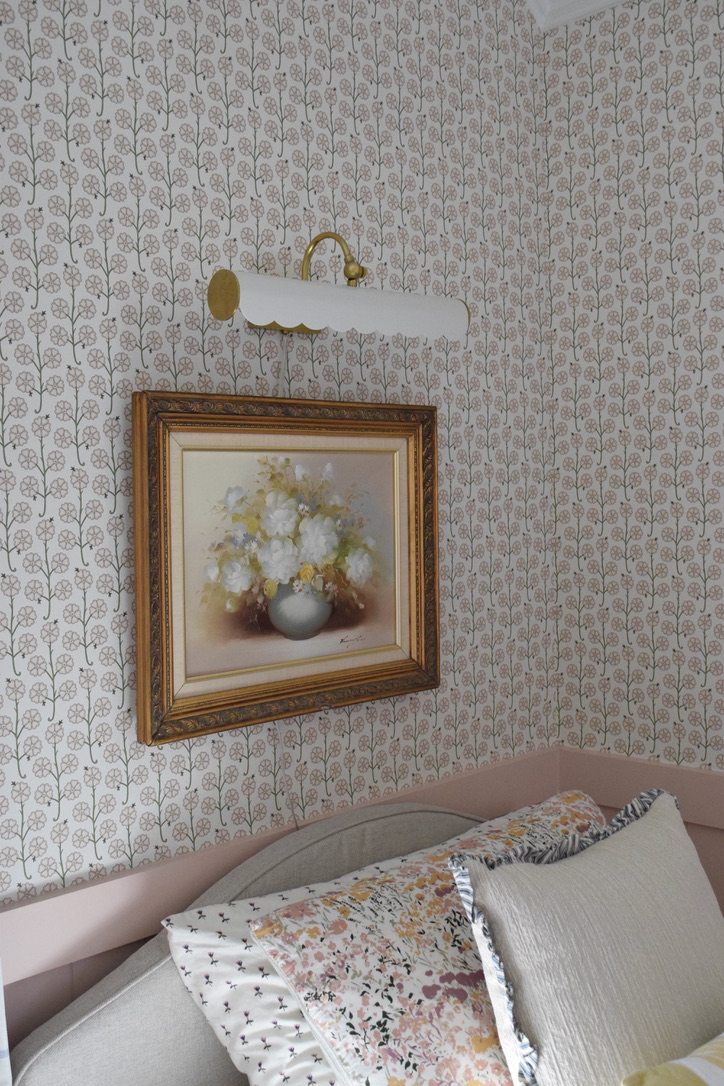
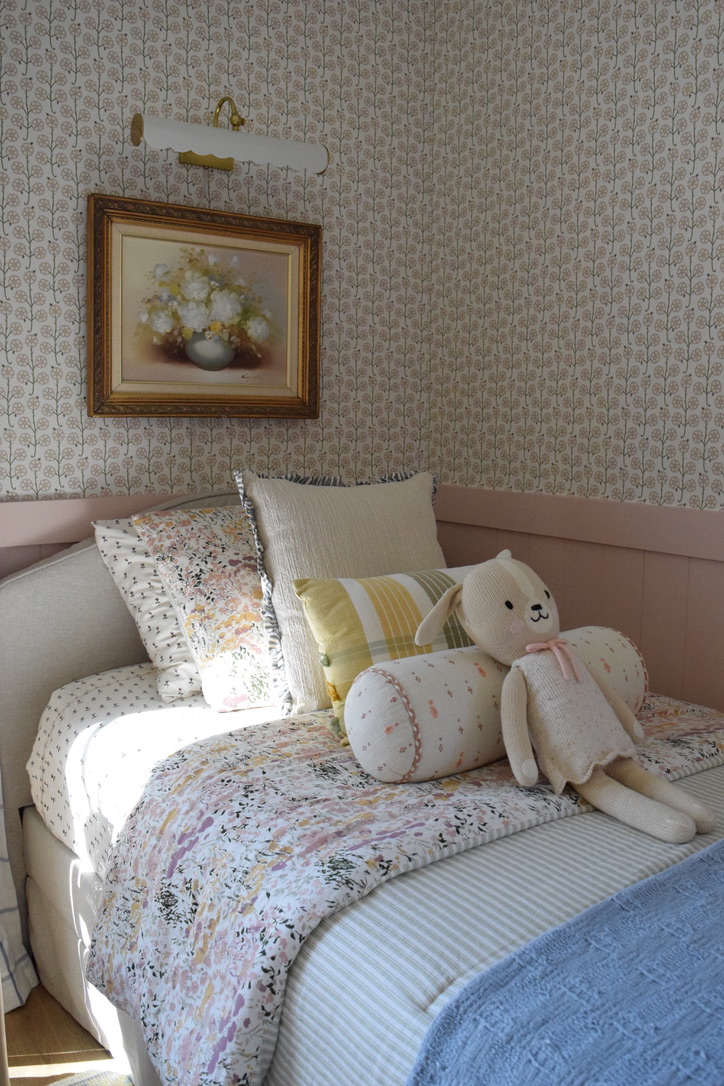
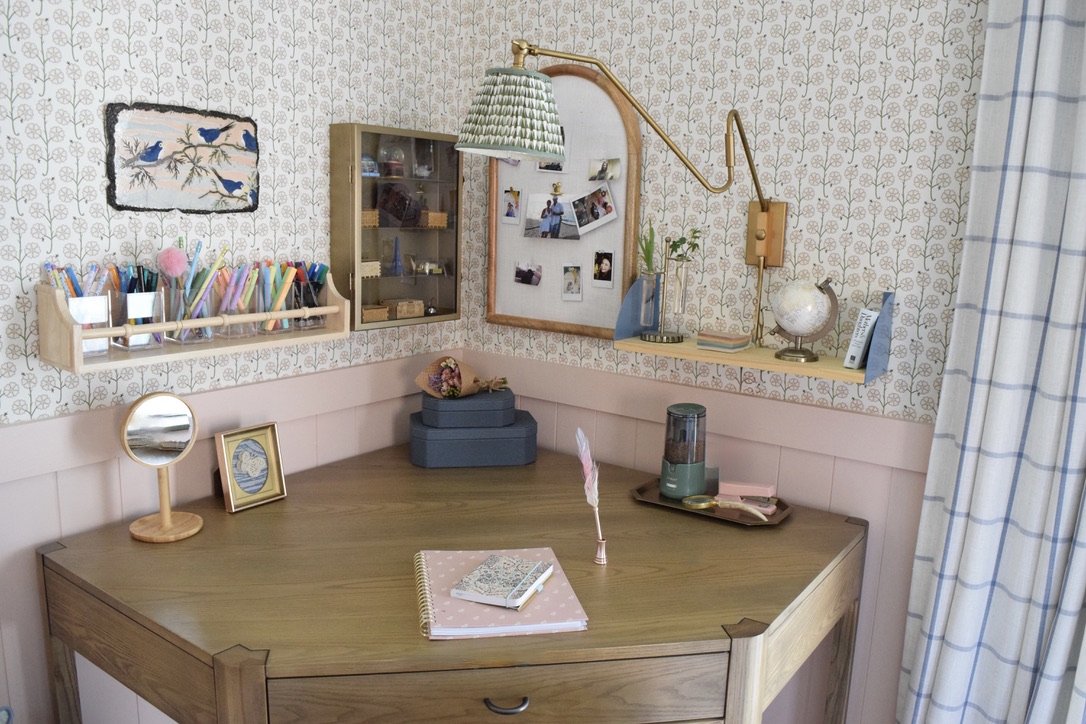
I found the art at a funky little vintage store in South Austin. It was in need of a little frame TLC, but luckily I know a guy that is handy ;).
The picture light above the art is from one of my favorite lighting companies. It is a portable plug in lamp so there was no need to do electrical work! It was a bonus that it had a clear cord. You don’t always get so lucky.
For the bed, I almost spent a bajillion dollars on a cute little Crate and Barrel bed but decided my child didn’t need a bed that was more expensive than mine. Ikea saved the day with this one!
The woven night stand was another Ikea treasure. I needed to meet a minimum for free shipping so I threw that little puppy in the cart! The top is a removable tray which is super handy for breakfast in bed! Except that AIN’T happening in my house. But in your house, that would be a great use for it! The bottom has storage for all the little junks that children think they need that really belong in the trash. As long as I don’t see it, it’s all good!
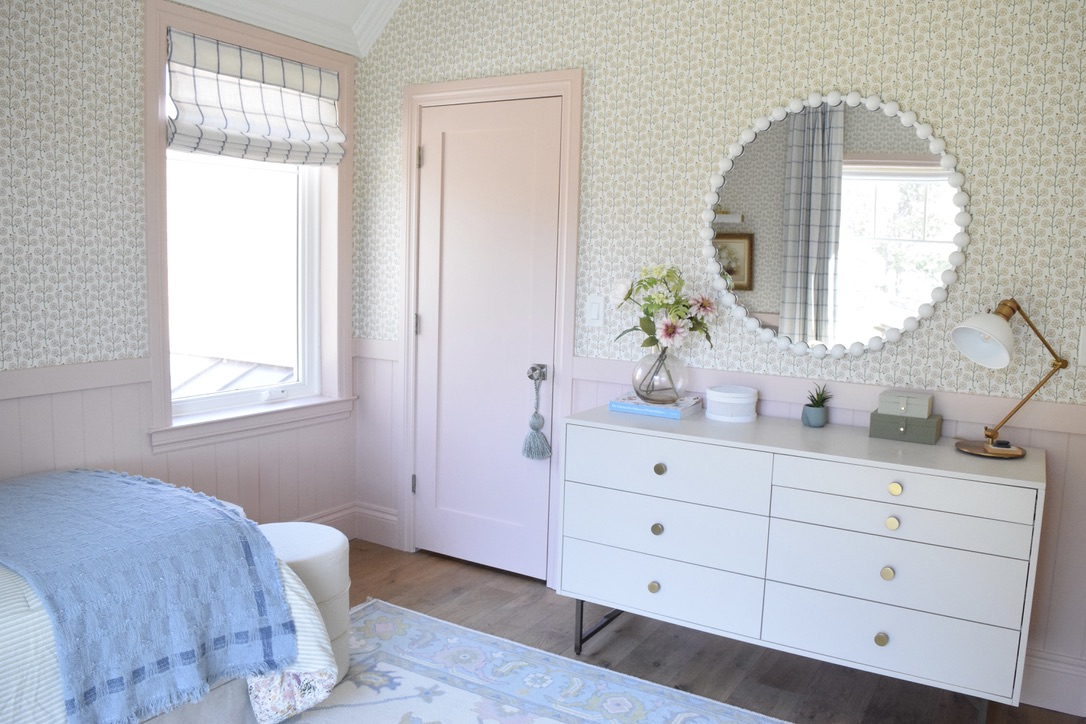
The Four Hands dresser provides lots of the storage space that my daughter was seeking. She has a dresser in her closet for clothes so this is a home for all her stuff. And let me tell you, all the stuff is categorized and tidy. It is drawer heaven inside this dresser. She makes me proud.
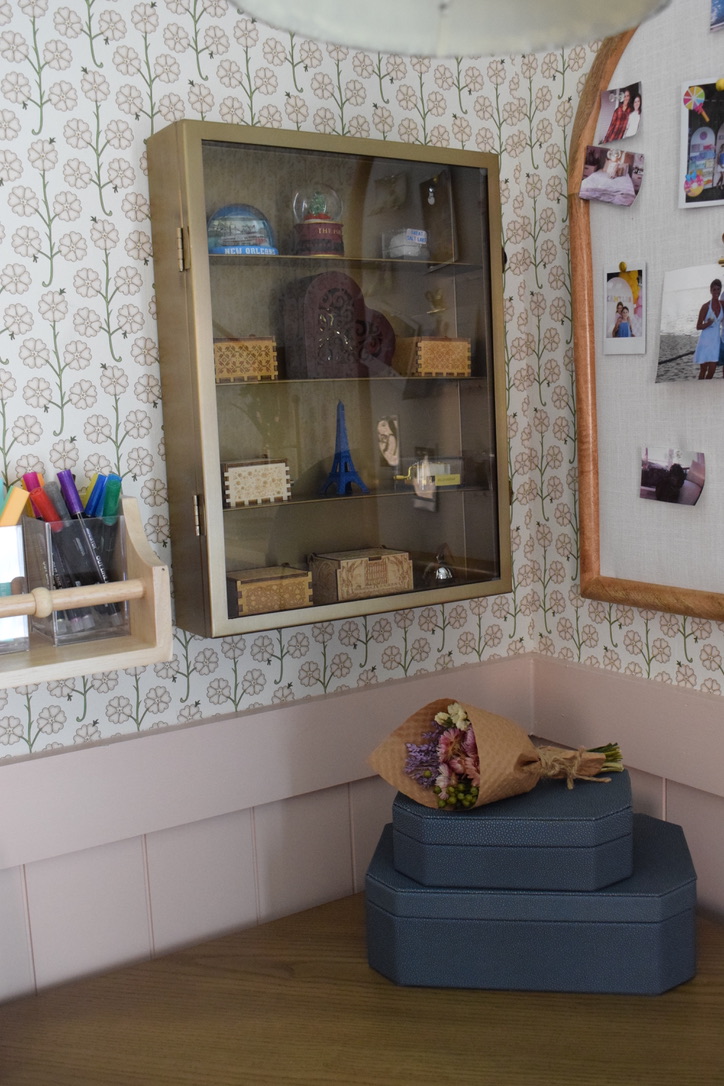
One of the hardest spaces to design and plan was the desk area. We decided on a corner desk to maximize floor space in her room since she wanted to be able to cartwheel at her hearts desire. She wanted the desk area to have lots of useful storage and since the desk only had one small drawer we had to take advantage of the wall space above.
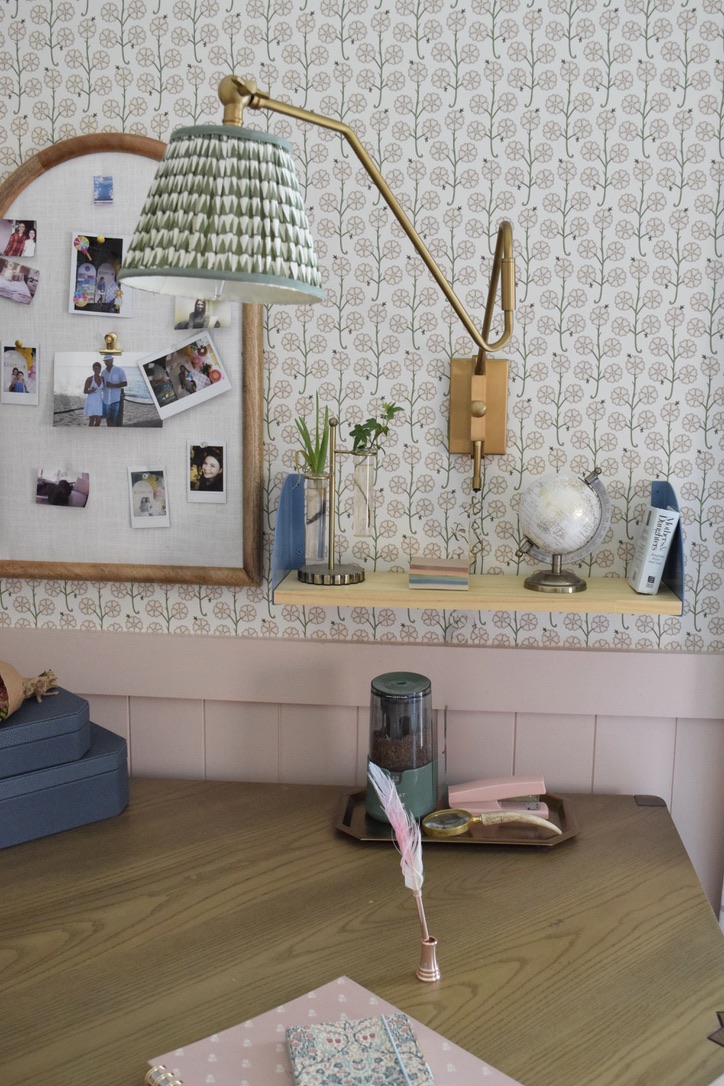
We created a little work station with all the essentials. Lots of planning went into this because you don’t get to make oopsies when hanging things on wallpaper. She has a pin board for pictures, a swivel lamp, a brass trinket display box and a shelf that holds all of her writing utensils.
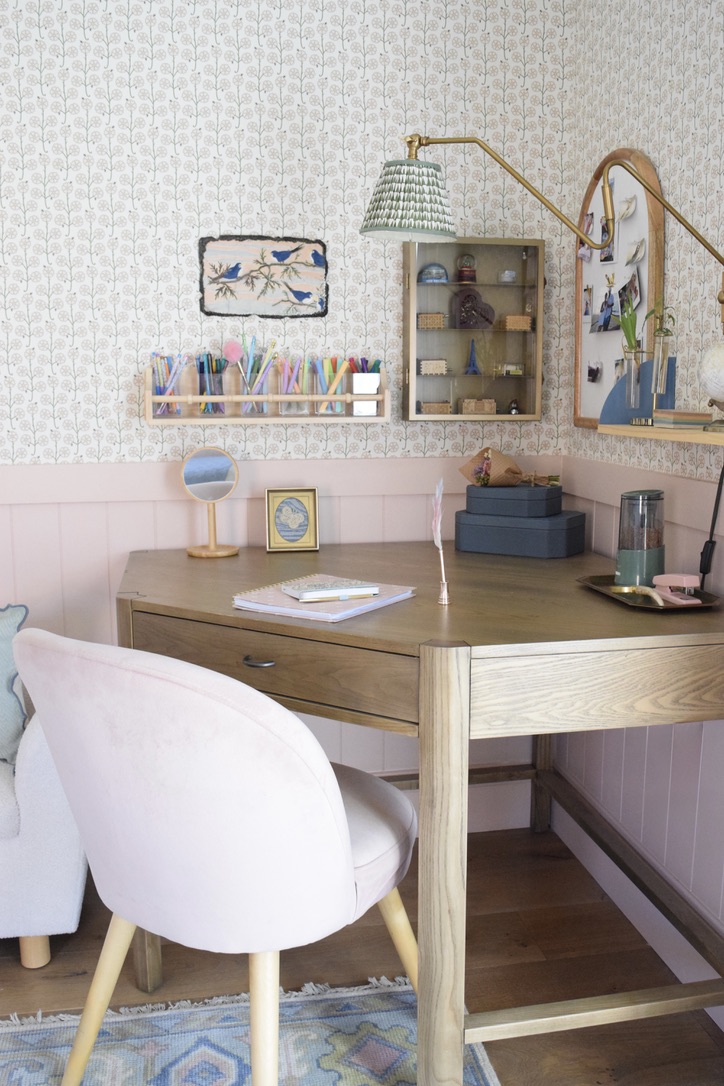
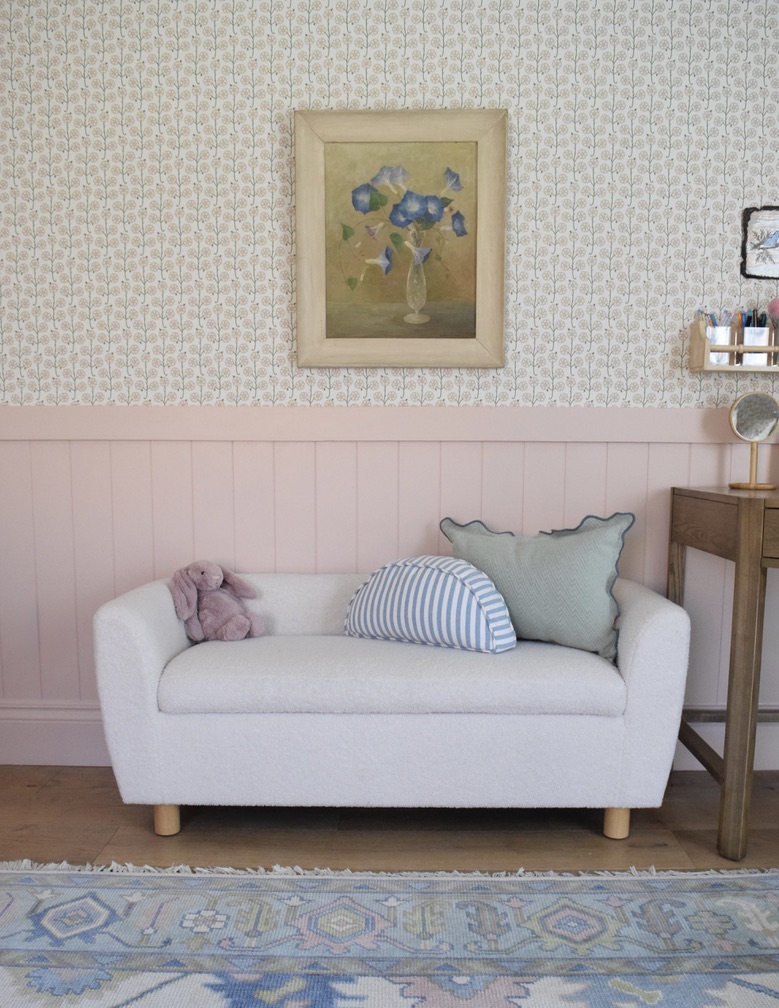
Next to the desk is a little couch for guests to lounge on. I am a frequent guest and can tell you from experience, this is a nice little spot to post up in! The seat pops up and is holding all of the stuffies that should probably be at Goodwill…
Whelp, that concludes the tour of the room remodel that was completed a year ago! Better late than never, I suppose!
Next up is Conleigh’s room! I have not started designing it yet so you can expect a blog on it in several years…
Until next time (which could be a long time)!
